Over the last week and a half I've made good progress on several fronts. On the wing molds I've assembled the jig for welding together the support trusses, and welded together most of two trusses. On the winglet transitions I've done the first pass of tier sanding and filled the trenches on the underside/outboard surface with Bondo, and also done the first pass of Bondo sanding. On the control stick platform not much visual progress has happened, but I do have designs now for the jigs for welding together various of the stick mechanism parts.
By the way, the wing mold support trusses were one of the crux points that caused me to take back the work on the wing molds. One of the reasons that that composites shop could bid such a low number of hours on the molds was that we meant different things when we said the word "truss." When I say "truss," what I mean is a fully-triangulated space frame structure like a warren truss or a pratt truss. What this other guy meant was a bunch of heavy steel welded together in such a way as that it is not necessarily well supported in either bending or torsion. That's not necessarily a bad thing; molds like that can be cost-effective and perfectly usable so to produce good servicable parts - so long as you respect their limitations and use them accordingly. However, such support structures are not trusses and should not be referred to as such. Anyhow, when I went back and re-ran that shop's bid to incorporate the time required to include fully-triangulated support trusses and some other improvements, the extra time required made their bid much less competitive. So I was back to square one on the wing molds.
As to why I want such good solid wing molds and not quick-and-dirty molds that I can sweat out oncesey-twosey parts out of, well, I'm betting on success. Judging by the success of his design for the RV-10 wing profile, Steve Smith knows what he's doing, so I believe that his wing design for this glider is a good one. I believe that these are wings worth making a lot of pairs of, and I'm betting that they're worth doing right, right from the start.
And now, over to the pictures for some detailed commentary. They're in chronological order to give you an idea of how I jump around between different aspects of the project:
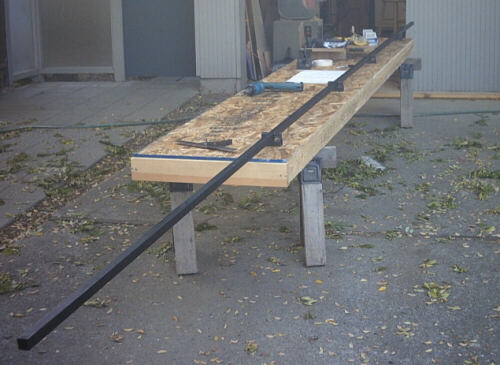
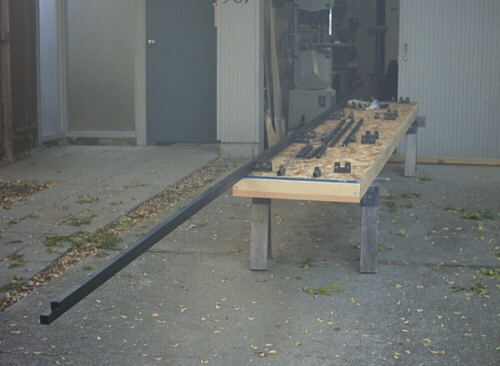
Here I'm starting to assemble the parts of the wing mold truss jig. The long 1" square steel tube is my straghtness reference; I put it in the cleats and then moved the cleats around until they were at the right longitudinal stations and I could sight down the tube and have it not deviate more than about 1/8" from straight. In truth, the methods that I'll use to attach the trusses to the mold shells with big globs of schmoo are really forgiving, so anything within about 1/2" of straight is fine.
Here I'm installing the cleats for the vertical stanchions. Rather than locate these by on-center distance, I'm locating them using my master part for the diagonal piece. That insures that I can chop out a pile of diagonals and have them fit into any truss bay. Afther this photo, I finised assembling the jig but by then it was too dark for a photo...
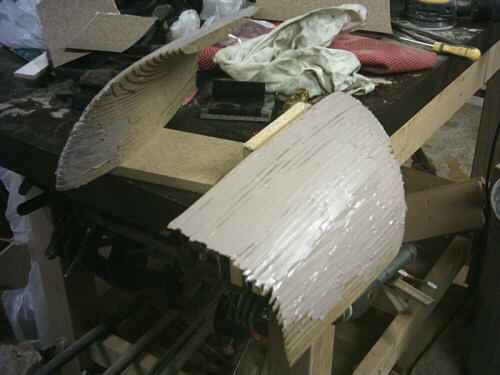
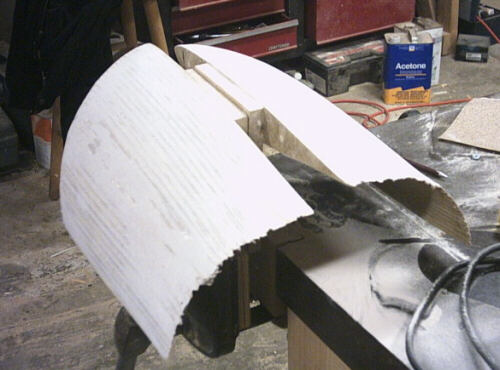
...So I went inside to work on the winglet transitions. These next two photos show how I've slathered the two transitions with Bondo to fill in the trenches.
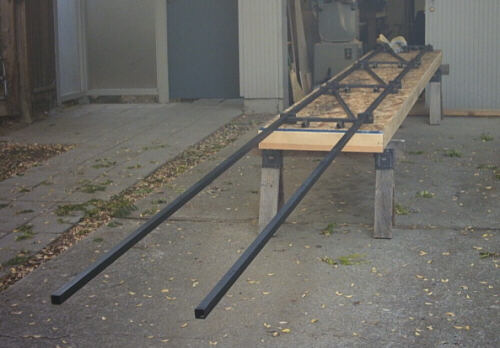
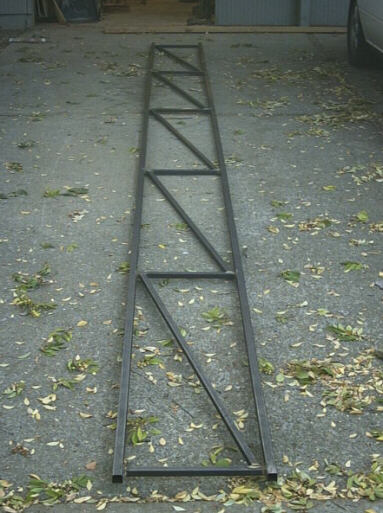
And a few days later here I am back in the driveway loading the finished truss jig for the first welding session. I have two longerons, three diagonals, and four stanchions, which is what it takes to make twelve feet of truss.
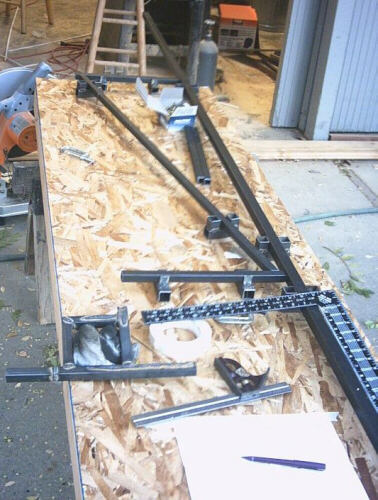
And here's the jig loaded for a half truss. After welding all this stuff togeher I'll rotate the part 180 degrees, plop it back into the jig, and then weld together the other twelve feet. Actually, I'll only weld together another eight feet; to keep these parts car-top transportable I'll leave them at the 20-foot length of the available steel tubes until I get them up to the shop. At that time I'll use the jig to splice on the extra four feet required to frame the last truss bay.
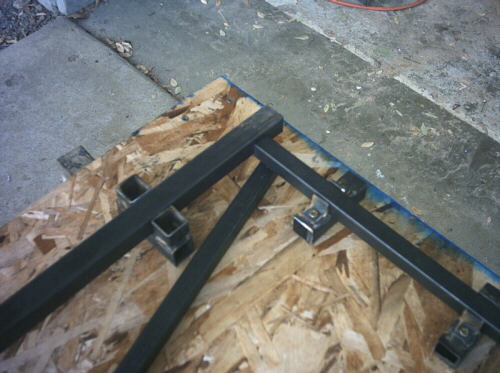
This view shows the geometry of one of the corner joints and how the longerons and stanchions fit into their cleats. The diagonal is resting on the table; after welding the stanchion and longeron I'll raise the diagonal into position and weld it to the stanchions at each end of the bay.
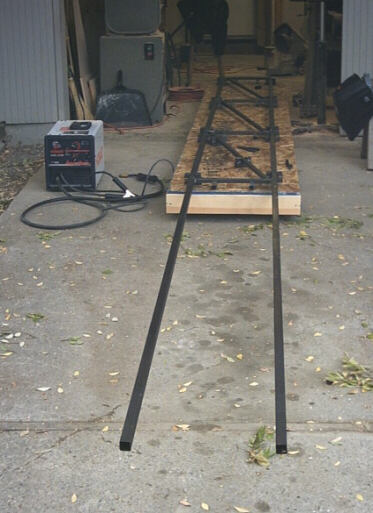
And here's the first twelve feet of truss. After this photo I did the rotation and welded together two more bays, but when I was finished it was too dark to get a good photo of the assembly. And after that I went inside...
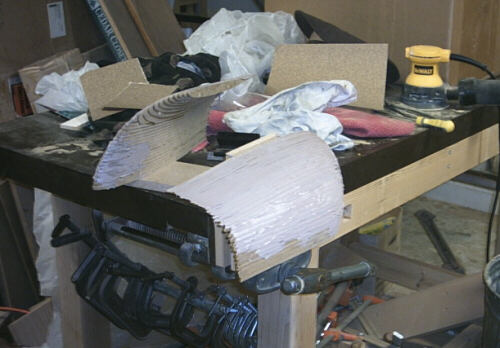
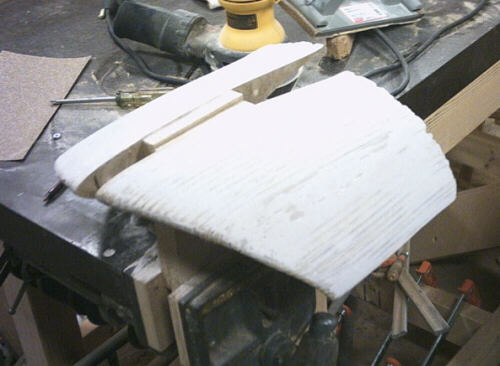
...And sanded most of the Bondo off of the winglet transitions, leaving only what was in the trenches between the slices as these next two photos show.
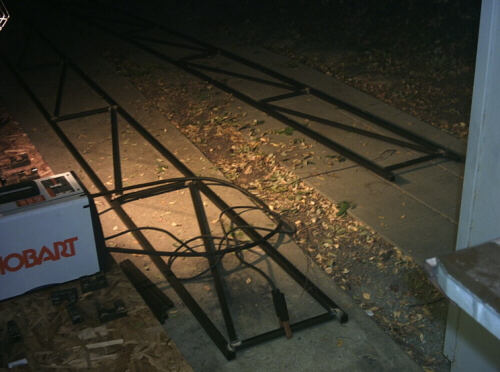
And then a few days later I got this photo of the first semi-finished (that is, in the unstretched 20-foot length) truss. After that, I reloaded the jig and welded up another 20-footer in the light from a tripod-mounted spotlight.
And here's that second finished truss, still smoking hot after I've flipped it over and welded up the back sides of all the joints.
I think I'll weld up one more of these 20-footers, and then transport the welder and the rest of the steel up to the shop to finish out the full set of eight 24-foot trusses. After that, I'll join the trusses into fully triangulated space frames. Then I'll be ready to make the mold shells.
page updated 20 October 2005 all text and graphics copyright (c) 2005 HP Aircraft, LLC