The following photos show some of the signs of progress in this program.
|
|
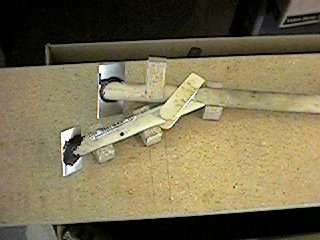
Here we're starting to assemble the jig for the 18-701 platform assembly. The jig is based on a wooden mockup that I built in an unfinished HP-18 fuselage pod. When working on square things with square corners, the best bet is to use drafting or drawing software package. But when working with a round shape, I find it easiest to go straight to work on the thing itself, and later get my measurements from the mockup. |
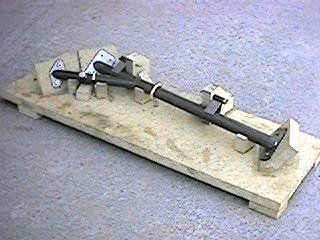
| And here we've got the 18-701 jig finished, and are fitting the steel parts into it. The long tube goes straight across the fuselage inside the knee hump, and the plates on the ends mount to phenolic pads (18-709) that get glued and glassed onto the fuselage shell. In addition to the glue and the fiberglass, there are a bunch of AN509-3 that go all the way through the fuselage shell, the phenolic, the fiberglass, and the steel to hold the whole thing together. Also, you can see the pitch pivots going to the upper right from the transverse tube. The angled extension on the left will actually be on the right side of the aircraft. It supports the roll bellcrank, and has its own little mounting plate. Like the larger plates, it mounts to a phenolic pad on the fuselage shell. |
|
|
|
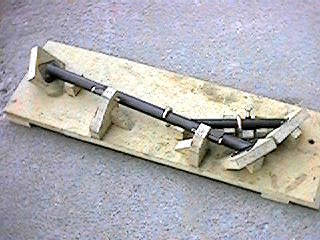
Here's another shot of the 18-701. This time, it is oriented somewhat as you'd see it from the right cockpit rail. If you look closely, you can see a bolt protruding from the angled extension. That bolt positions the mounting bushing for the roll bellcrank, and will be used to center the bellcrank's BC4W9 bearing. |
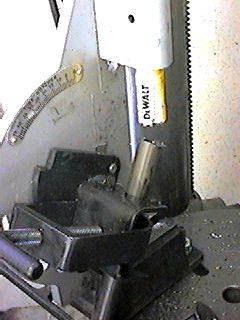
| And here I'm preparing to notch the end of a tube that will be used for the angled extension described above. The thing that says "DeWalt" is a bimetal hole saw that has the same diameter as the transverse tube. After I cut through the extension tube, it will fit exactly in its spot, making it easy for the TIG welder to get a good high-strength joint. |
|
|
|
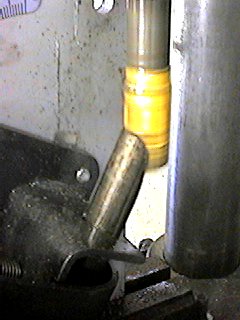
And here's the tubing notcher in action. This sure is a sweet tool to have for steel tube projects, but gosh it sure eats up hole saw blades in a hurry. The nine extension tubes I notched while I had this setup in place broke off about half of the teeth on this DeWalt blade. It was a wonder that it even got through the last one with half it's teeth gone. Next time, I'll be a lot more careful how I start and finish the cuts, so as not to snag and break the teeth. |
page updated 04/02/01 all text and graphics copyright (c) 2001 HP Aircraft, LLC